If you are a frontend developer, it’s likely you might be a little uncomfortable working with some non‑frontend things. One of those is CI/CD.
In fact, I didn’t touch this directly for the first two years of my career.
Introduction
-
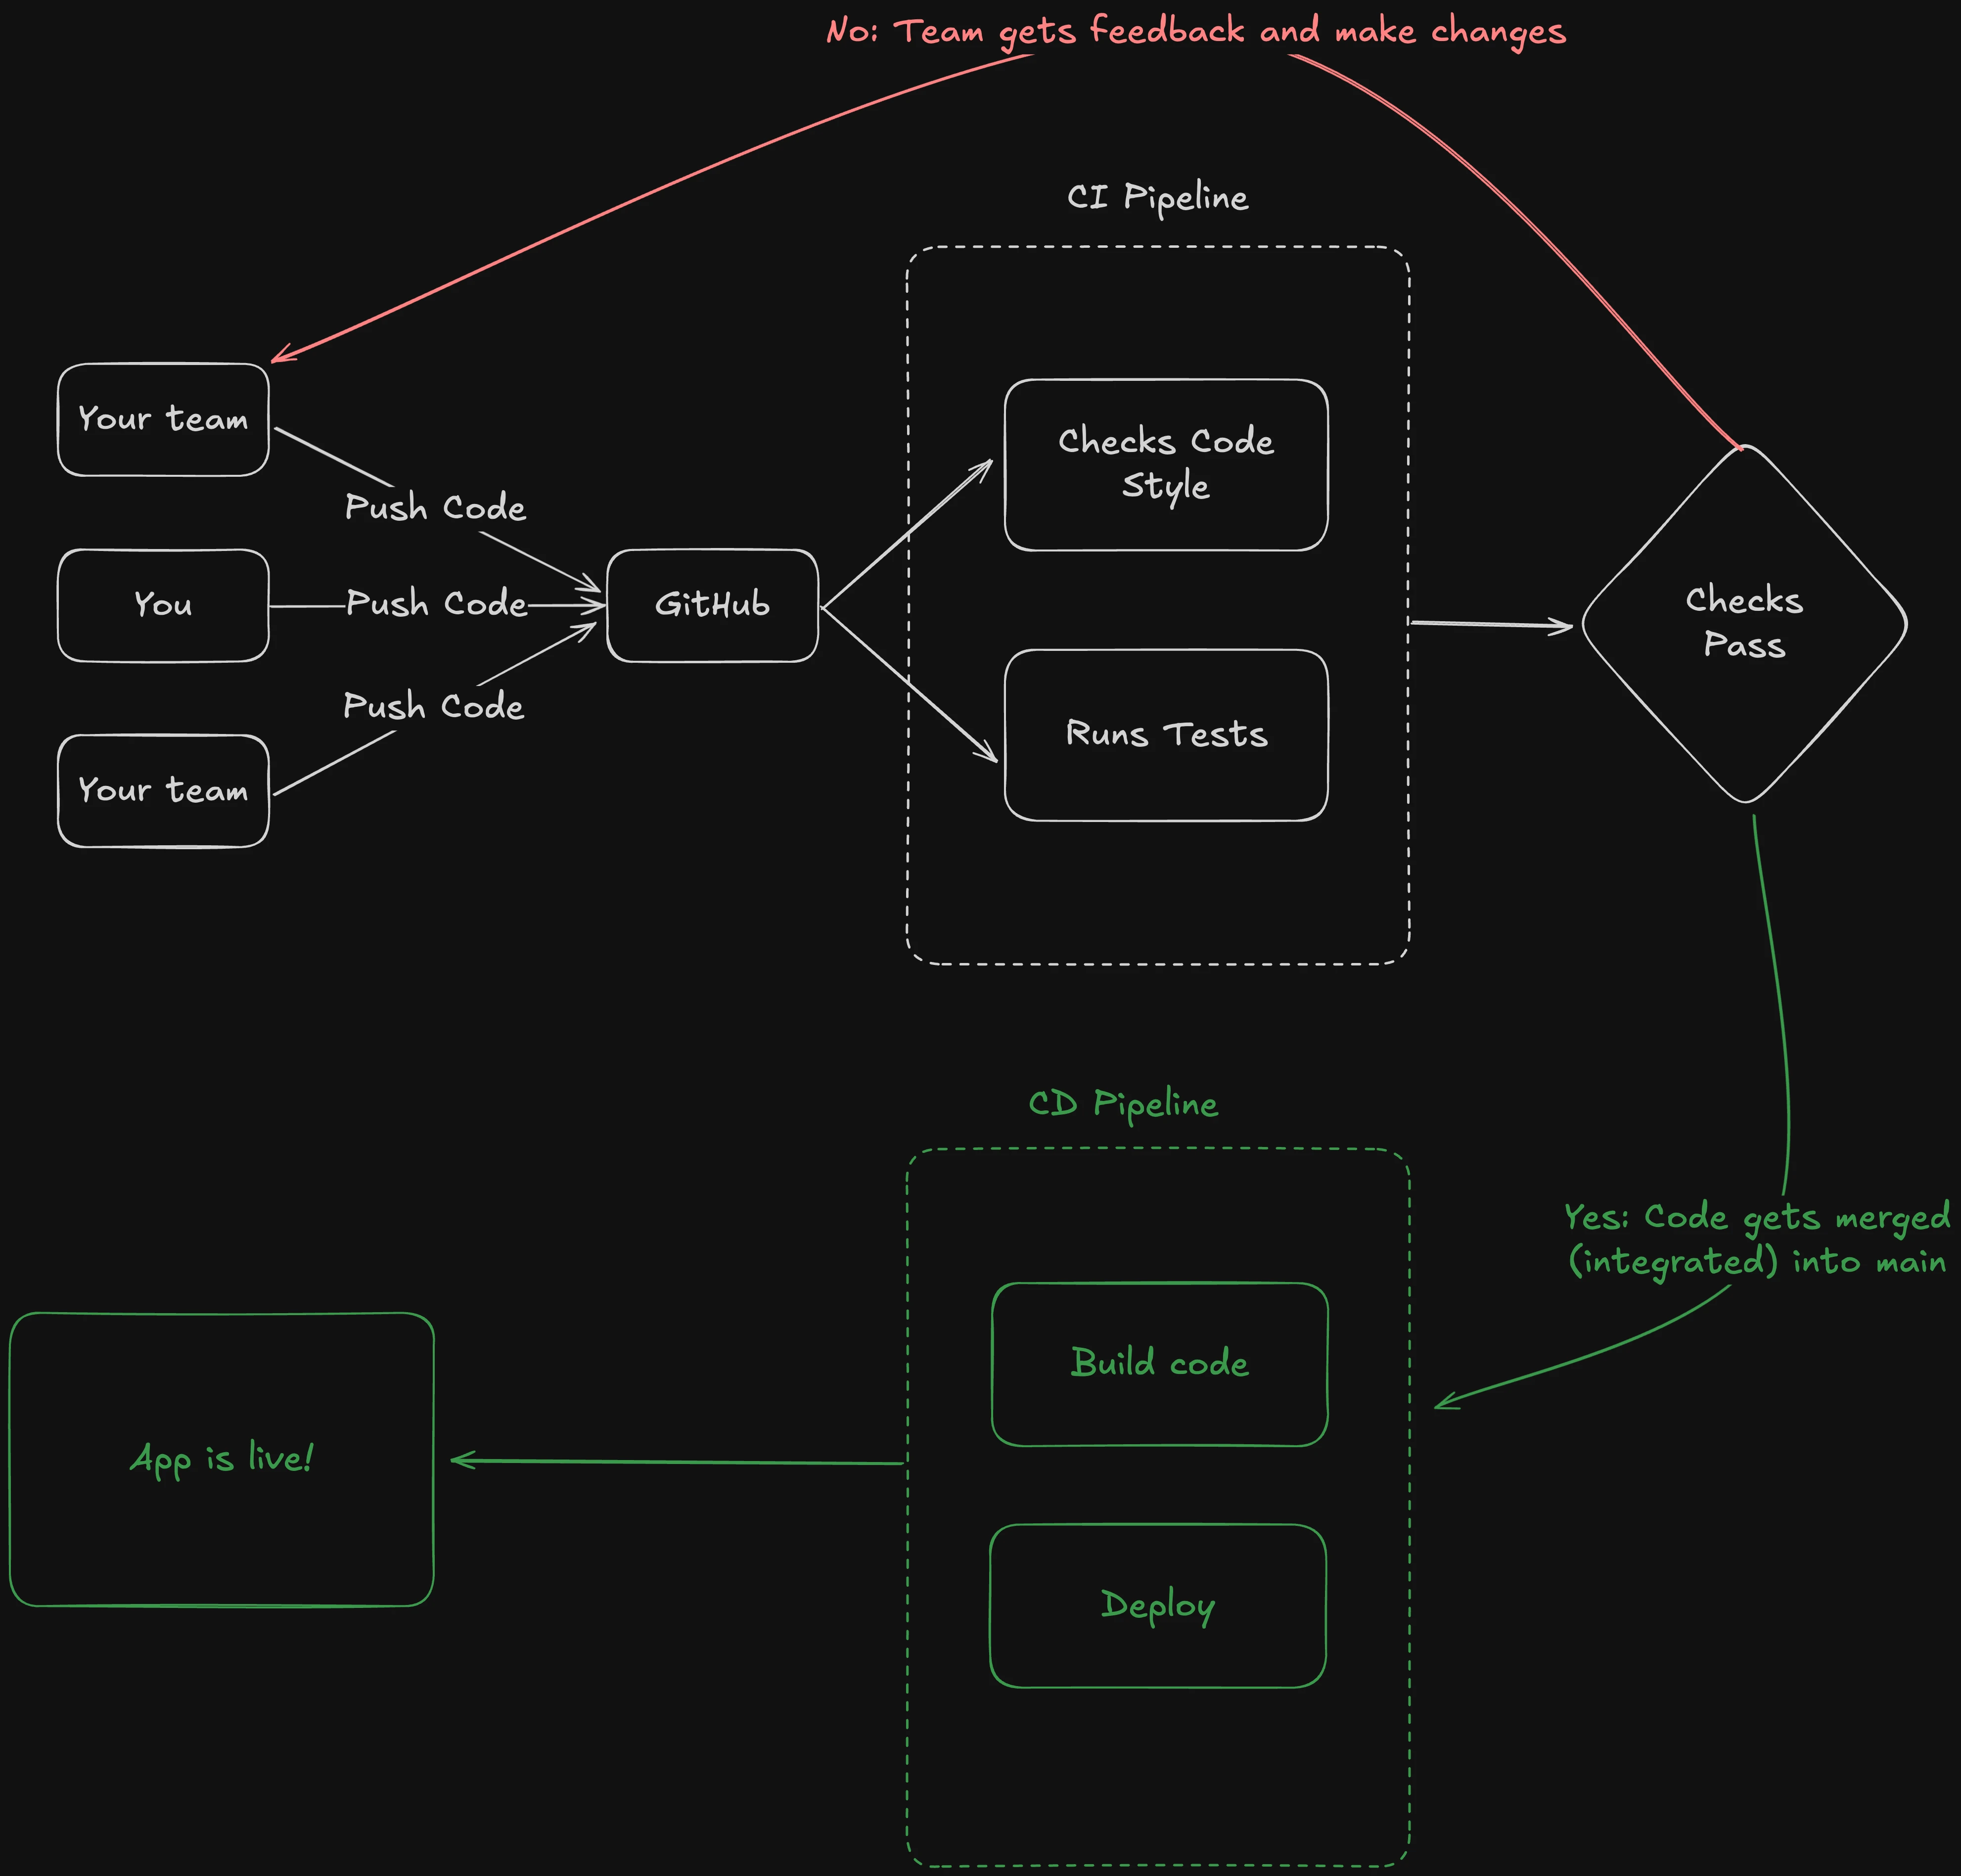
Developers (you and your team) push code to GitHub.
-
The CI Pipeline (Continuous Integration) starts automatically:
-
It checks code style.
-
It runs tests to ensure everything works correctly.
-
Or anything that has to run before code can be merged.
-
-
If the checks pass, the code is merged into the main branch.
- If not, the team gets feedback and makes the necessary changes.
-
Once merged, the CD Pipeline (Continuous Deployment) begins:
-
It builds the code.
-
It deploys the application.
-
If required to staging and dev environments also.
-
-
Finally, the app goes live!
Course Content
A pretty straightforward content:
- A starter repo with
prettier,eslint, andtestsalready set up. We just move those checks to the GitHub Actions Workflows. - We also cover minor
eslintconfiguration.
Starter Repo
We have created a GitHub repository with the initial setup to make it easier for you. You can fork or clone the repository and start working on the project. The branch should be 0-init.
- Clone the repo:
git clone https://github.com/yaralahruthik/fh-ci-cd-todo-app.git- Then run the following commands:
cd fh-ci-cd-todo-app
pnpm install- Finally, run the dev server:
pnpm dev- Also, publish this to your own GitHub account, otherwise, you won't be able to follow up with the rest of the course.
In the next section, we will set up a CI pipeline with GitHub Actions.